Git is a well-known version control system. Linus Torvalds invented it in 2005, and Junio Hamano has maintained it since then.
Let’s break it down and explain the terminology:
- Control System: Essentially, Git is a content tracker. So, while Git may be used to store material, it is mostly used to save code because of the additional functionality it offers.
- Version Control System: As new code is contributed, the code saved in Git changes. In addition, many developers can add code at the same time. As a result, the Version Control System assists in dealing with this by keeping track of what modifications have occurred. Git also has features like branches and merges, which we’ll go into a bit later.
- Distributed Version: Git is a distributed version control system that has a remote repository that is hosted on a server and a local repository that is saved on each developer’s workstation. This implies that the code is not merely saved on a central server, but that a complete copy of the code is present on all of the developers’ machines. Since the code is on every developer’s PC, Git is called a Distributed Version Control System (DVCS). Later in this blog, we’ll go through the differences between remote and local repositories.
Why Is A Version Control System Such As Git Required?
In most cases, numerous developers work on a project at the same time. As a result, a version control system such as Git is required to verify that there are no code disputes amongst the developers.
Furthermore, the needs of such projects change frequently. As a result, a version control system enables engineers to revert to an earlier version of the code.
Finally, numerous projects that are running concurrently may use the same codebase. In this scenario, the idea of branching in Git is critical.
Git For Windows Installation Procedures
When you install Git, you are prompted to choose a text editor. If you don’t already have one, we strongly recommend that you get one before downloading Git. You might find our list of the top text editors for coding useful in making your decision.
Git For Windows
Step 1: Go to the Git official website: https://git-scm.com/downloads
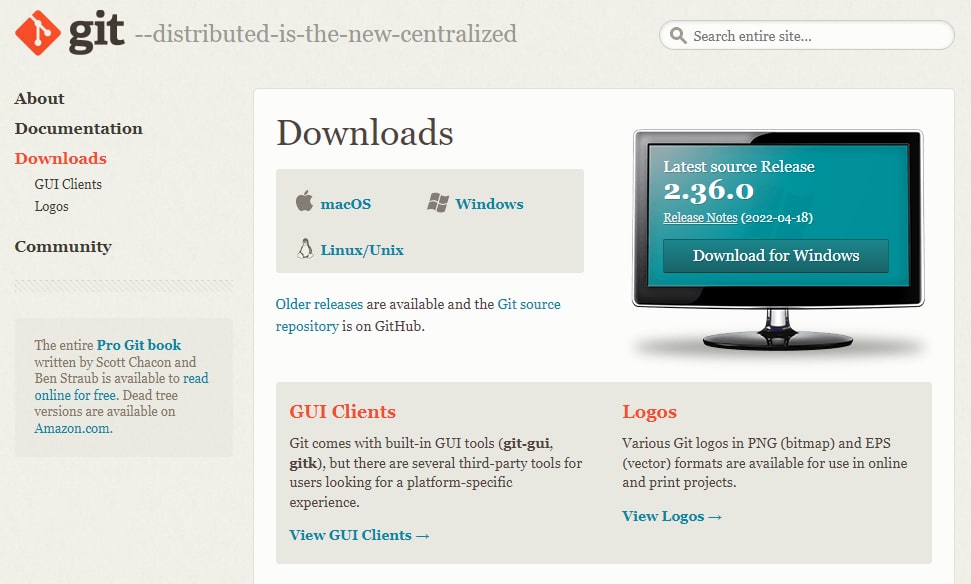
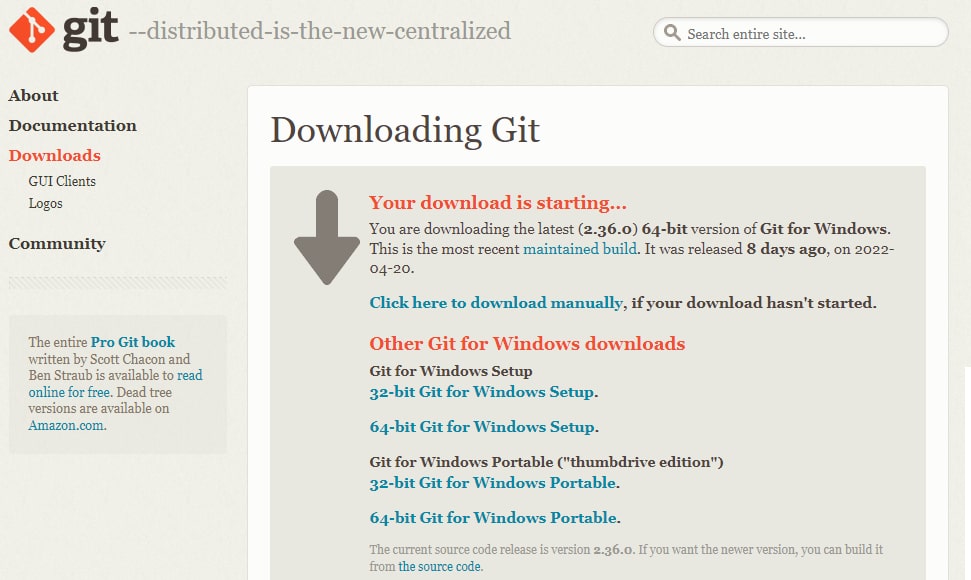
Step 2: Allow the download to finish by clicking the Windows download link..
Git Installer Should Be Extracted And Launched.
Step 3: Navigate to the download location (or use the download shortcut in your browser). To unpack and start the installer, double-click the file.

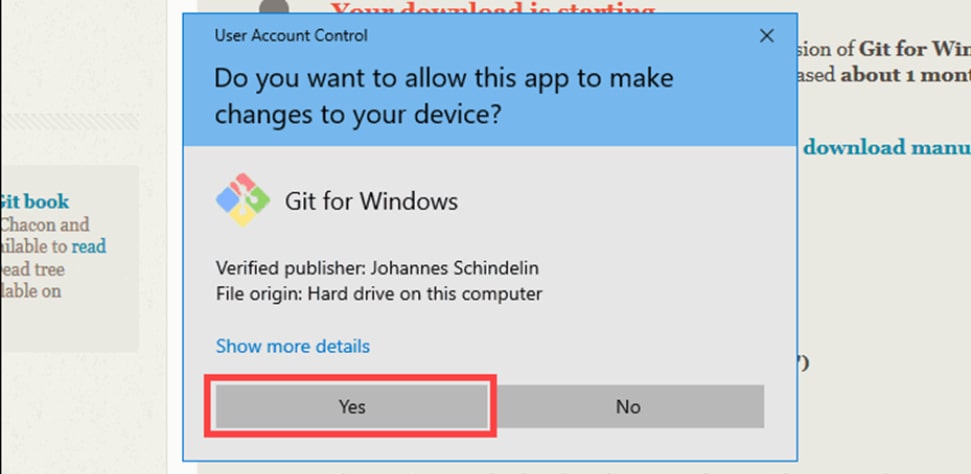
Step 4: Allow the app to make modifications to your device by checking the box in the User Account Control window that appears.
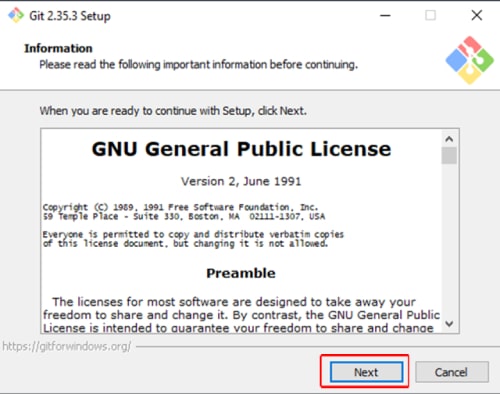
Step 5: Evaluate the GNU General Public Licence, and then click on Next when you’re finally ready to install.
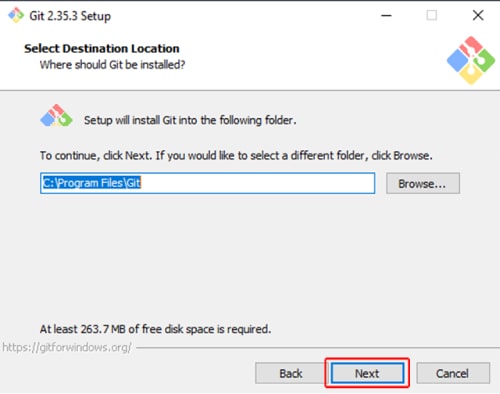
Step 6: The installer will request an installation location from you. Leave the default settings alone unless you have a good reason to modify them, and then click Next.
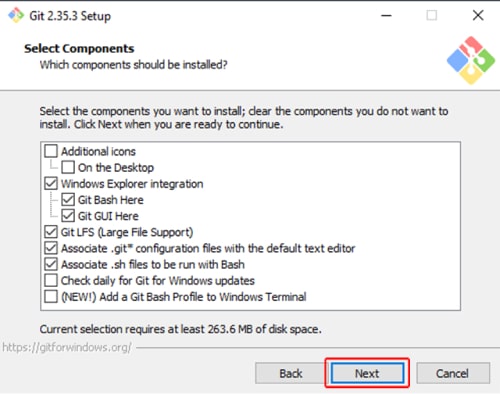
Step 7: The component selection screen will appear. Unless you have a special need to modify them, leave the settings alone and click Next.
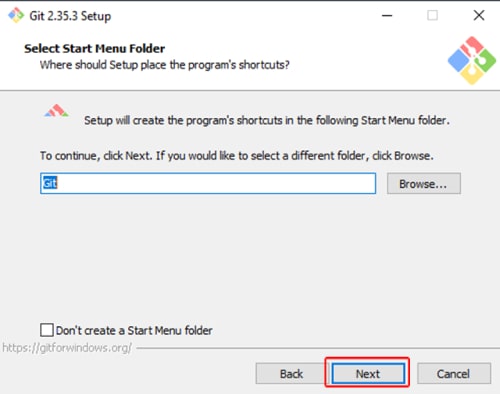
Step 8: The installer will prompt you to make a start menu folder. Simply press the Next button.
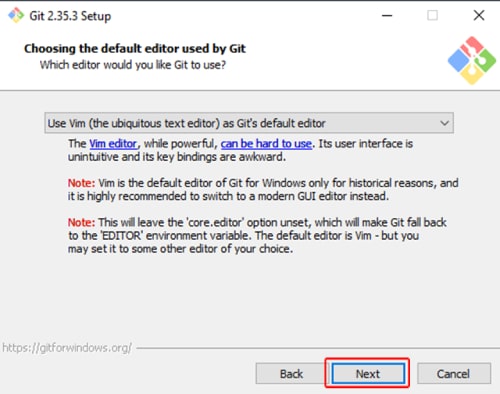
Step 9: Git can be used with any text editor. Select Notepad++ (or whichever text editor you want) from the drop-down menu and then click Next.
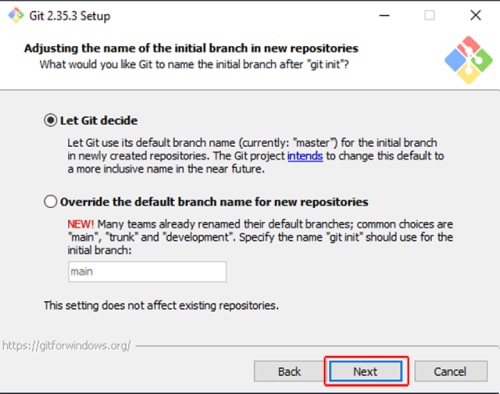
Step 10: Your initial branch name can be changed in the following step. The default setting is master.’ Unless you’re part of a team that requires a different name, keep the default choice selected and click Next.
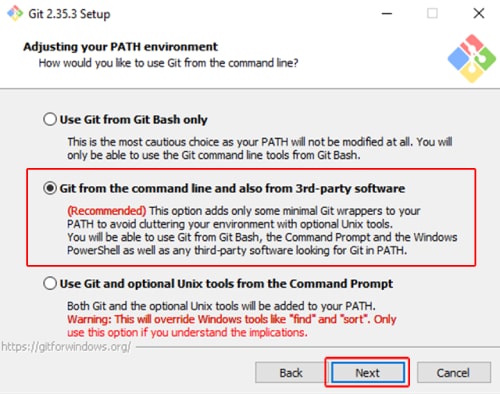
Step 11: The PATH environment can be adjusted during this installation phase. Run a command from the command line, and the PATH is what is included by default. Choosing the middle option (preferred) and clicking Next will continue.
Terminal Emulators, Server Certificates, And Line Endings
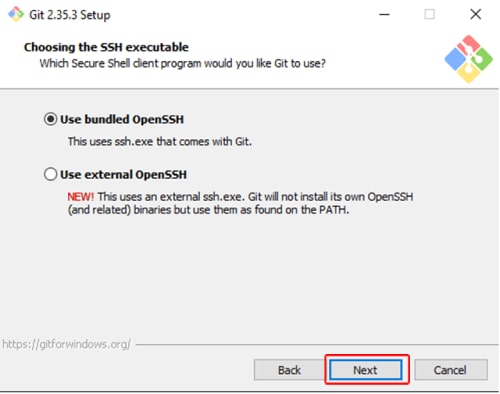
Step 12: The installer now prompts you to choose the SSH client you want Git to use. Git comes with its own SSH client, so if you don’t require one, leave the default choice selected and click Next.
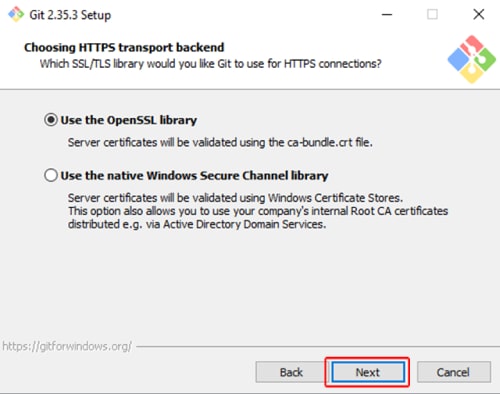
Step 13: The following option is for server certificates. Most people should stick with the default. If you operate in an Active Directory environment, you might need to use Windows Store certificates. Next, click the button.
Step 14: The following option transforms line ends. It is advised that you leave the default selection alone. This is related to how data is formatted, and altering this option may result in issues. Next, click the button.
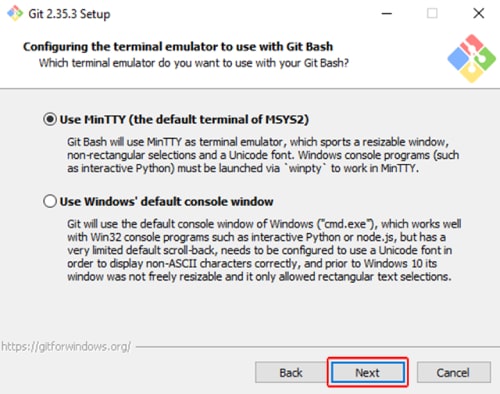
Step 15: Choose the terminal emulator that you want to utilize. Because of its features, the default MinTTY is suggested. Next, click the button.
Step 16: The installer now asks what the git pull command should perform. Unless you have a compelling reason to modify its functionality, the default choice is advised. To continue with the installation, click Next.

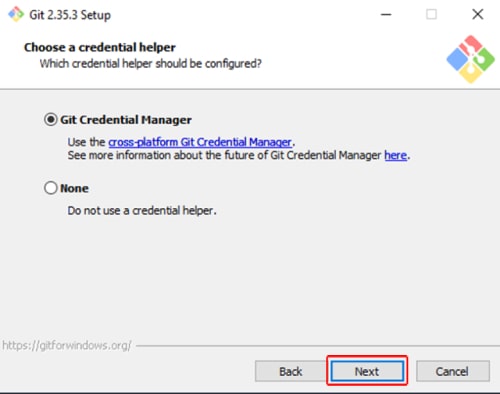
Step 17: The next step is to decide which credential helper to employ. Credential helpers are used by Git to retrieve or save credentials. Leave the default selection alone because it is the most stable, and then click Next.
Additional Personalization Options
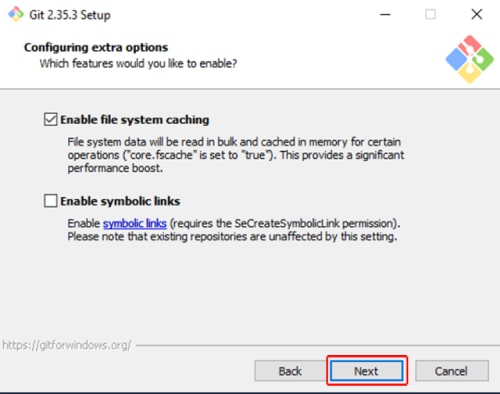
Step 18: The default parameters are suggested, however, this stage allows you to select which additional features to activate. Tick the box if you utilise symbolic links, which are command-line shortcuts. Next, click the button.
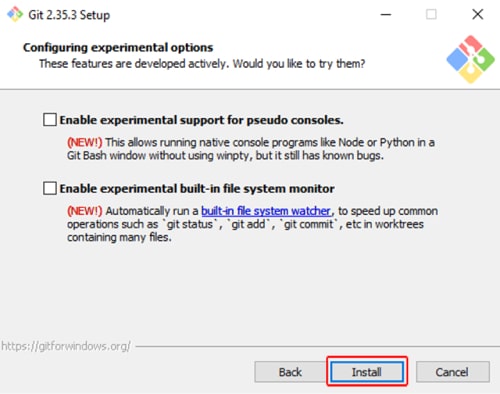
Step 19: It may offer to install experimental features depending on the version of Git you’re installing. At the time of writing, the options to incorporate support for pseudo controls and a built-in file system monitor were available. Unless you’re feeling very daring, leave them unchecked and click Install.
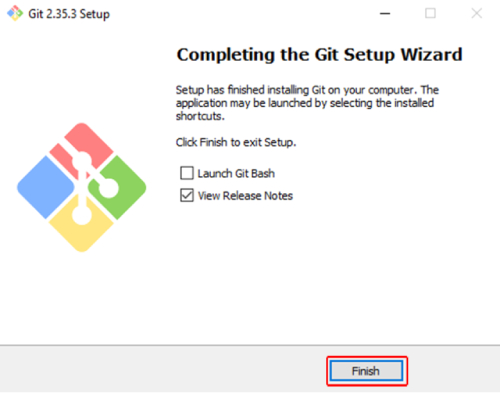
Step 20: When the installation is finished, check the boxes to see the Release Notes or to launch Git Bash, then click Finish